Create Trial
Fill Out Trial Creation Form

Fields include your First Name, Last name as well as your email address. This data will be used to start the trial account as well as create an agent profile in the help desk. Next, add the company or help desk name to create the subdomain for the trial account. Please note, the trial account created will become the active account once subscribed so no configurations of the trial are lost! Once all details are entered, click the green “Get Started Now” button to activate the trial. 
There are 2 scenarios that could happen from there:
Scenario 1:
| Action | Expected | Actual |
|---|---|---|
| User Clicks Confirmation Email First |
|
All Good! |
Scenario 1 Screenshots:
Almost Done Page:
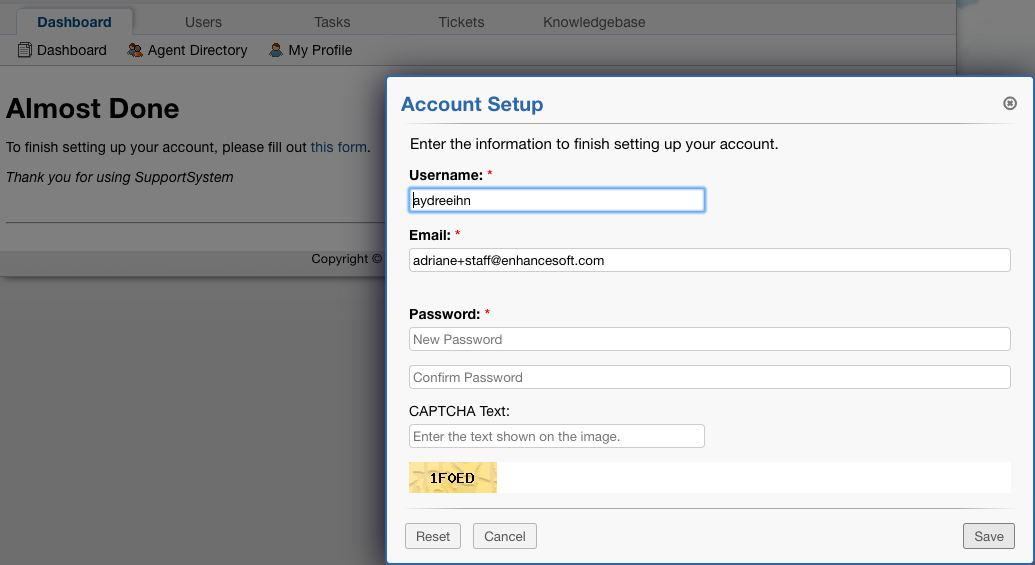
 After Correctly Submitting Form:
From there, the agent is logged in and can go to any tab they want to.
Scenario 2:
| Activated Page | ||
|---|---|---|
| User clicks to account setup first |
|
All Good! |
Scenario 2 Screenshots:
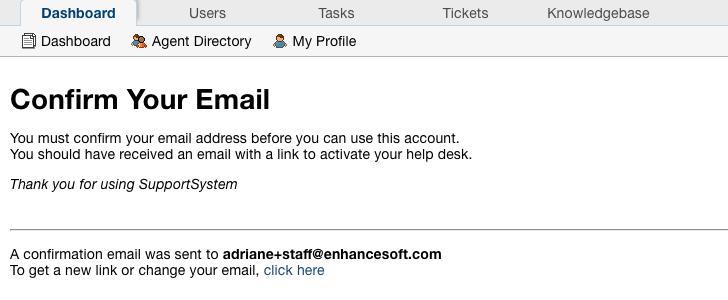
Confirm Your Email & Setup Account:
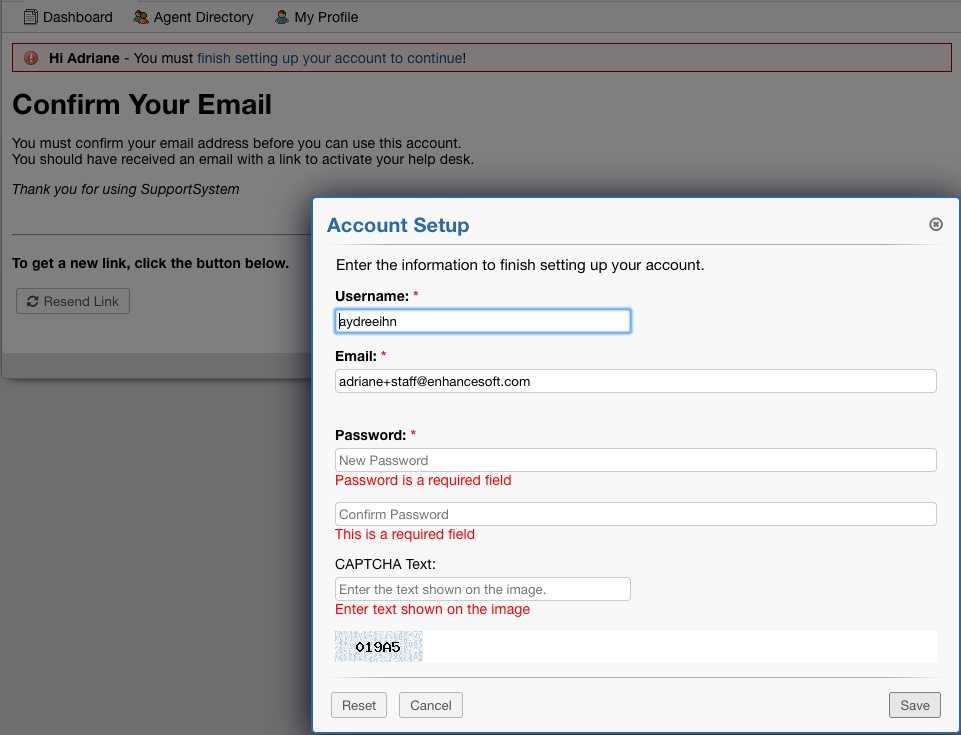
Submit account setup form:
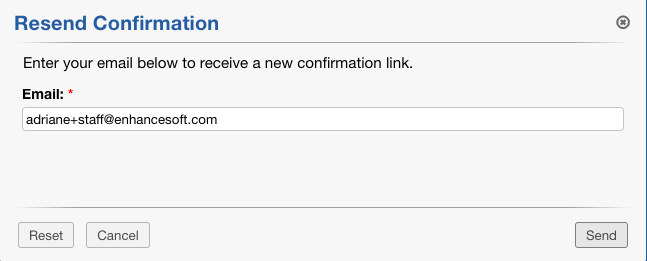
 Resend Form:
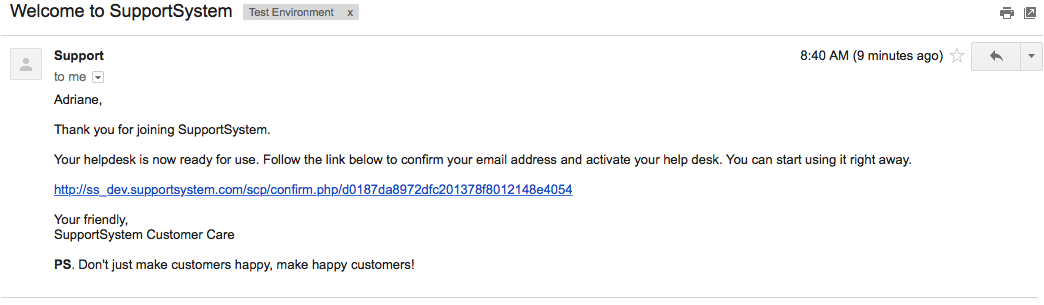
Resend Confirmation Email:
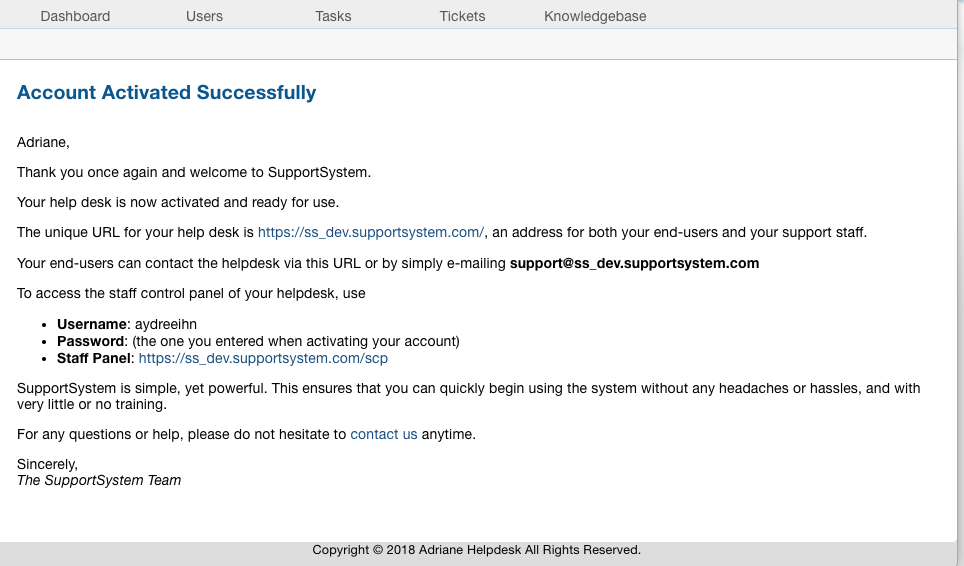
 Click Confirmation URL:
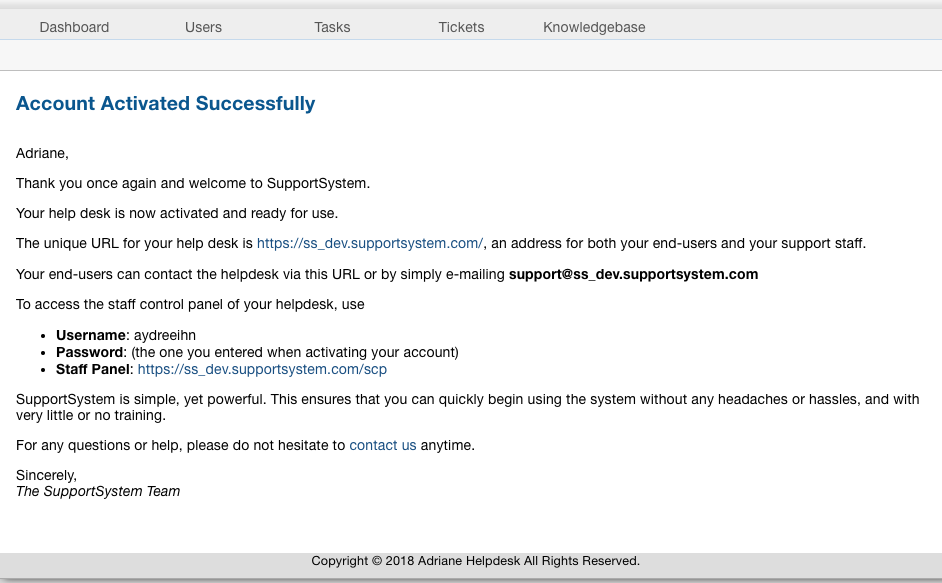
 From there, the Agent is logged in and can go to any tab they want to.
If an Agent tries to visit to the Confirmation URL after everything has been done: 

(This page is shown to all agents where staffid > 1 since the first agent is the one who set up the account. This ensures that we don’t give out the admin’s username.)